Saturday, August 10, 2013

Activity Mat

I was working in my church's nursery for boys and girls age 18 months- 3 years. We had zero budget to buy or maintain toys for the children's play time.  SO what do you do when the kids are bored with the current toys?  Aside from raiding your own children's toy box.... you create something.

I was given the idea that perhaps we could make a car mat (like the colorful rugs for matchbox cars) from a tablecloth.  And while that is good... I figured, if I was going to make one, I might as well go big. 

I purchased a rectangle plastic tablecloth (the kind with a cotton fuzzy back) at Wal-Mart for $3.00.  I then picked up some colored duck tape from the dollar store.  I drew out my plan on a sheet of printer paper.

I got fancy with buildings that the children from church hear about so that as they mature, they could use the mat to help encourage creativity - make up stories, etc.  It could also be used to teach the children.  And since I know that children can never all agree on what to play... I divided the large table cloth into 2 sides.  One side was the "town" for small cars and the other was a hopscotch pad.

This is cheap and simple to make - takes NO special talent or tools.  This works best when laid out on a rug because the backing helps "hold" it to the rug.  If you plan to use on tile or hardwood, I would add a little carpet tape (rubber on one side, tape on the other) to help hold it in place.

Sunday, August 26, 2012


As a Latter Day Saint (Mormon), I am often called upon to make dinner or dessert for someone who is sick, as a welcome gift, or as a gift for those I visit with regularly.  Not to mention for parties, pot-lucks, and birthdays.

I have been on a journey this year to learn to eat better.  So I have searched to find ways to make really yummy things, with less sugar, sodium, fat and carbs.  Here's one of my favorites. To me, its SUPER yummy.

What you will need:
One graham cracker crust shell (you can buy a low fat version)
One box of fat free, sugar free JELL-O instant cream cheese pudding (white chocolate also tastes yummy)
2 cups reduced fat (not fat free) milk, cold
1 cup fat free cool whip
4 oz. reduced fat cream cheese, room temperature
Berries to top (or some chocolate to drizzle - sugar free carmel ice cream topping tastes yummy too but I really prefer berries - normally black, blue, and strawberries)


In a bowl, combine pudding mix and milk.  Beat with a hand mixer at a medium setting for 1 minute.  Add in the cool whip and the soft, cream cheese.  Beat on low until well mixed.  Then beat on high for 2 minutes. 

Pour mixture into the pie crust and place in the fridge for 30 minutes.  Remove and top with whatever berries you want, in whatever design that tickles your fancy.  The picture above was for July 4th.

This doesn't have the consistency of cheese cake - but it is thicker than pudding.  If you want it really thick you can also add some GELLATIN.  I also like to freeze this before cutting. MMMM

When you are over-weight, people just assume you eat poorly.  I was asked when my baby was due last week.  Talk about a self esteem buster. I have lost weight but after breaking my foot in May and being in a cam walker until the beginning of August - my efforts to loose more was put on hold.  I tried working out right away but my foot is still in pain and healing - its been a long wrong.  But I am getting back into my routine.  Can I just say - just because someone weighs more than you, does NOT mean you are healthier or that you eat better.  I am not a fitness guru, nope - (hehehe I giggled a bit at the thought of that....) 

I know that there are a lot of things I could do better - but supplementing something like this into your normal diet, is a good thing.  Something EVERYONE can do.  And no "diet" will ever work if you cut out everything yummy.  And trust me, this is really good - make sure you keep your portion size down.  If you make it... let me know what you think!  OH and yes, other pudding flavors are just as yummy!


If you ever find yourself in need of a cute, easy party favor.... look no further.   Chocolate covered pretzels!!!

If you need a girl's party favor... these are "wands".  If you need a boy's... these are light sabers.... If you need an adult... these are "gourmet pretzel rods". :)  Its all in the description!

What you need...
Chocolate melting wafers or almond bark (found in the baking section)
Sprinkles, chopped peanuts and/or colored cookie sugar
Pretzel rods

I purchased my rods in a big tub at SAMS club.  This is good because you can have some as snacks, you can make chocolate pretzel rods and you can smash some to bits to put into brownies (but that is a WHOLE different blog, hehehe).

I decorate (or used to) cakes so I have a set of Wilton food color pastes. This means I normally buy white chocolate and then color it the way I want.  However, AC Moore sells a great little combo bag of chocolates that has red, blue, yellow, green, and white in it. 

People melt chocolate a MILLION different ways.  I have never had success with the microwave (I always burn it - when it gets thick and/or looses it shine).

So I do it the way my mom used to do when we made painted chocolate candies for Easter.  You take a  small sauce pan (if you are just using one color) or a metal 9x13 cake pan if you are doing a lot.  Fill it with about 2" of water and heat until boiling.  Then shut off the heat.  While you wait for the water to boil....(because admit it, if you stand there and watch the water it WILL NOT boil)... get your chocolate ready.

I use a glass pint canning jar (yay me for reusing).  You could probably use a thick glass cup as well, or an old mayo jar (if they even use glass anymore).  Fill the DRY jar to the very top with chocolate. (Trust me here... fill it to the brim).

Wait about 5 min and stir with a spoon.  You will find your chocolate wafers or almond bark will melt to liquid as soon as you stir it.  Stir it smooth.  At this point if you are coloring it - do so now.  DO NOT USE liquid food color. It has to be the paste kind... liquid and chocolate do NOT mix.

Next, dip your rods 3/4 into the jar.  Then let your pretzels drip :)

Next over a large salad bowl, sprinkle your pretzel while turning with whatever kind of decoration you choose (if you choose any).  Then set on an UNGREASED piece of foil or on wax paper.  It will cool on its own.  I lined a cookie sheet and when I filled it - I threw it in the refrigerator for a minute....to speed the process.

You can also dip your pretzels then drizzle with white chocolate.  Just dip your spoon in the white chocolate and then in a quick sweeping motion go back and forth across the pretzels - leaving white streaks.

Ok wa-la.  You can package them- you can serve them on a platter... just don't eat too many of them or you will not be able to buckle your jeans.  Again, I am not saying that I know this from experience, eh-hum.

So simple... kids love them... parents secretly sneak them.. its a win win.  Plus, am I wrong, but they LOOK like they take forever.

Start to finish for all these was 20 mins. **shhh, its our secret**


Fun make yourself crayons

Are you like me?  I am always trying to think of neat stuff to do with my two girls.  I want them to think back on their childhood and say... My mom was present.  She did things with us.  She was there for us.  She didnt just clean, cook, or blog.  I want them to say... I remember when my mom did _____.

This near phobia of mine - to ensure my children have a good childhood - leads me down many paths.  Some are completely misguided. Some just miss the mark.  Others are tolerable.  And every once in awhile, I stumble upon greatness.

While I can not take credit for the idea... (thank you pinterest!) I found a gem of making our own crayons.  But it is not an unsupervised craft.  And nor is it for someone who doesnt want a little mess.  But with many stores running specials on crayons for back to school  this is a must do.  (I got a few boxes for .25 each - woot!)  GO ahead... do this... make a memory with your child/children today!  In 25 years, this is the stuff they will remember!

Ok so lets get to it already!  Here's the list of things you will need.

One silicone mold - we had a heart ice cube tray
One box of crayons
Craft scissors or a pairing knife
Cutting board if you use a knife
Microwave
Imagination !

The first part seriously played into my girls inner desire to destroy things and to "pick" at things.  Remove the paper from all of the crayons.

Next part is for the adult. Cut the crayon into little bits. I learned that by cutting them smaller that they melt faster.  Now here is where the imagination kicks in.  I didnt want to just make normal colors.SO I had the girls create their own color combinations.  If you mix colors in the tray, they will melt and be swirled....so they dont really "melt" into a new color.  You could try stirring them with a toothpick to make them actually combine into a new solid color (?) perhaps.

Once you have them all filled up (to the tippy top) then carefully place in a microwave.  We have a 1200 watt oven. I did it slowly so I wouldnt get a crayon explosion!  I heated them at 70% power for 30 seconds at a time.

I let the girls watch the crayons slowly melt and deform. Abby was not convinced after the 4th round that this would work.... ahhh little one of little Momma faith....

After about 3 minutes... we got this.

I would HIGHLY recommend NOT touching the mold or moving it for at least 15 minutes.  No need to discuss HOW I know this... just trust me.... Melted crayon feels like molten lava on your skin.


When the crayons are melted, they are shiny.  As they dry and re-harden, they become more matte looking, although they do keep their gleam a little.  I couldnt bring myself to destroy *Crayola* brand crayons (something in me just kept screaming it was wrong).  So we did the el-cheapo Rose Art crayons.

 
The finished product comes out of the mold very easy and is beautiful.  The mixed crayons make a rainbow effect.  You can buy shapes like leggo men, hearts, stars, fruit, and holiday ones. Make and enjoy.  These make great gifts for teachers, fellow students, friends for the holidays

Tuesday, April 24, 2012

Ressurection Rolls

Ok, so I can't take credit for inventing this - I saw it on Pinterest.  But it was just way too cool not to share it here.  Years ago, I had a recipe for cookies that you whipped up and put in the warmed (but turned off) oven overnight - and when you woke up, the cookies would be done - and hallow - to represent Christ rising from the dead and leaving an empty tomb.

First, you must know that holidays in my home are all about traditions.  There are few things that I can put my finger on and say that they definitely came from my own childhood.  I would visit with friends and I would see their family's traditions and I always thought that these rituals enhanced their family.  So, I invented a bunch for my own little family.  I hope that when my children grow up, they can not remember what toys they got under the tree or what the Easter Bunny brought them in their basket.  No, instead, my friends, I hope that they remember the special times we had together.

So now that I have you feeling all warm and fuzzy... let me tell you about these great rolls.

First- the ingredients... and no, this is NOT for the diet section of your recipe file. 

Canister of Crescent Rolls (yes I used reduced fat, because that makes them all healthy - right?)
1 bag regular size marshmallows
1 stick melted butter 
1/4 c. cinnamon mixed with 1/8 c white granulated sugar  (make sure you are heavy on the cinnamon)


At this point - take a minute to explain to your kids what each of the ingredients represent.
Crescent Rolls:  The cloths that Jesus' body was wrapped in
The Marshmallow:  Christ's body
The Ba-dda: Christ's Spirit
(really - I couldn't come up with some whitty thing for this)
Cinnamon:  Sins and sorrows of the world
The Oven: the stone tomb

Look how smart I was... I even took a picture of the oven's temperature. Doesn't that impress you! I sure the heck am impressed.  As you can see below (giggle), set the oven to 350. (Look ma, I'm a PROfessional).

First, open up your can of crescent rolls.  No, no picture of this - I was still beaming about the oven picture, so I neglected to take a picture of the rolls. haha.  Just pop the can and separate the pieces so that they are easily grabbed.

NEXT - roll the marshmallow in the butter and coat it well.  I gave it a couple quick flicks when I was done to help the extra butter drip off.


Next, coat the marshmallow in the cinnamon mixture.  My kids loved this step.  It let them feel like they were playing with dirt.  And really that was the idea... remember to point out to the kids that sin makes our spirit unclean.  I'm not sure if I should be worried at just how much Abby seemed to like the concept of getting the spirit dirty....


Next, place the dirty marshmallow on a crescent piece of dough and stretch and fold the dough around the marshmallow.  Now a couple of tips based on my own failures... Be sure to use CLEAN fingers.  DO NOT put a hole in the dough - anywhere... nope, while it is not hard to clean up melted marshmallow (hot water does the trick), it is also NOT fun!  And finally... pinch baby, pinch hard!  You wanna make sure your seams do not come undone.


Place them on a non-stick baking pan and place in the oven until golden brown. It took mine about 8 minutes.  See my lovely pictures below.


While we waited for the rolls to cook, we read the story of the resurrection in the bible.  If your children are a little young to sit and listen to the scriptures, try showing them these awesome bible videos on the resurrection:  Bible videos.  They are fabulously done.  We watched the videos before we started, and then we talked about them while we waited.  I would suggest you ask your kids what they think will happen in the oven.  If you are adults making this, you may want to read this article as it is truly amazing: He is risen - A prophets testimony.

I also let my girls taste straight cinnamon.  But be sure you have a drink near by.  Once they had the bitter on their tongue, I explained to them that making the wrong choices in life, sinning, would leave us with bitter feelings in our hearts - just like the cinnamon.  I also pointed out tho, that everyone makes mistakes and when repentance is added (let them taste the cinnamon and sugar mixture -but hint--add more sugar before you do this to let them see you adding the sugar) then it makes our life complete - and the bitter taste is removed.

Finally, break open the roll and reveal to the kids that Christ did rise from the dead - the tomb is empty.  And enjoy because these taste GREAT!  I ate too many of these, but I just kept repeating in my head... these are heavenly rolls and therefore are good for me.

I am a slacker, I know - I had meant to post this before Easter, but didn't get around to it... its that whole, live in the moment with your kids concept that just keeps me from doing stuff like this on time.  However, even though this is a great Easter treat and an even better tradition (if I do say so myself), it would also make a great Family Home Evening lesson.  For those of you who do not know what Family Home Evening (FHE for short), it is a time we are asked to set apart during the week (most family's it is a Monday night -for us we do Tues most weeks) to reinforce the lessons we have been taught on Sunday.  We share the responsibilities of preparing the lessons, saying prayers, singing a children's hymn or listening to one, and then an activity and treat to help drive it all home.  FHE, in my opinion, should not become preachy but rather relaxed and is successful when the family can have an open discussion about what we are taught at church.  If you do this, you get the lesson, activity, and treat all in one.  Its like buy one get two free!

I would also suggest more than one canister of rolls - you will seriously like these cinnamony-rolly type rolls and they make an AWESOME gift.

In the end, I do not know if my girls will look back on nights like this and think what an awesome, cool, and inspired mom they have... .. errr wait, I mean... look back and think what an awesome gift spending time with family is, but its my sincere hope, that I can let them feel my love for them through quality time spent with them.

I have learned not to blink since I've had kids.  If you take your eye off the ball for just one second, a few years will pass and that's the cruel thing about childhood - you never get that time back.  When children are young, trusting, and pure of thought - it is a gift that simply can never ever be recaptured - here or in eternity.  So, when your little five year old takes a sharpie and colors on your new leather couch, don't be like me - don't loose sight that the joy of motherhood, of family, of children, is in the messes.  Enjoy the journey and never wish your children out of "phase" because you are literally wishing their childhood away.  I try to capture events in my memory and recall them, in a futile effort to keep them from disappearing.  I love my family - messes, cinnamon and all.

Wednesday, March 28, 2012

Sinnabons!


OH YES... I said SINnabons!


Ok, so I won't lie... I love to bake.  When I was three years old, I was like an only child, even though I had 2 sisters and a brother.  But because they were much older than I was, they were at school and off with friends most of the time.  SO, like many only-child homes, if a person was trying to find me - they only needed to find my mother.... because surely I would be tucked in behind her knees.


My mother baked our own bread, along with any sweets that we got.   So, while she was making pies from fresh ingredients (blueberry was my favorite and I loved to go pick them too), I was right beside her with a play dough rolling pin.  She believed that you could NEVER re-roll pie dough, so I got her scraps. I started making something her mother had coined as "Johnny Rolls".  I assume because Johnny (whomever that was) loved them.

So I would roll out the pie dough, spread butter on it (with my hand), then sprinkle with a heavy-on-the-cinnamon and sugar mixture.  I would then roll it up and place it in a pan.  I made these since I was 3.  To this day, I love this taste. 

Well, that was until I had a Cinnabon at a mall.  It was so rich, creamy, cinnamony that I was only able to eat 1/2.   But I was spoiled. I went back each day that I was in Raleigh NC to partake of my new-found love.

How LUCKY was I when I discovered that there was a cinnabon in the Scranton PA mall!!!   YUM.  However, the $4.69 +tax price tag made me cringe.  Really?  Is it REALLY worth that?  Oh heck yes.  I love the cinnabon recipe.  

Pillsbury discovered that, like me, many people LOVE that brand.  So they tried to can it up and present it as "just like cinnabon".  Not a fat chance.  Oh yes... I said FAT... because if you partake of a REAL cinnabon - you will be ingesting 24 fat grams (thats 1/3 of a daily value of "good fat"), 730 calories, and 114 carbs.  So, it is definately not an every day treat. 

But sorry Pillsbury, in my opinion, you fell far short.  So I set out to find a recipe that WOULD taste like it.  And I am proud to present a copy cat recipe that is DELISH.  I mean, mouth watering, sugar rush, heavenly, ooooo so amazing recipe. But, it doesnt cut down much on the "bad stuff", sorry.  And being on a quest to live healthier, I have not made these in forever - but wanted to make them recently... not to eat but to share!  So for those of you who got some, feel lucky - I dont give them up easily.  I did make some mini-ones so I could have a taste. 

My dear little (nearly 5 yr old) Abby said to me, "MMMMMM. What did you put in those!" To which my (7yr old going on 30) Emily replied, "Sugar and love". 

She didnt realize how right she was.  This has lots of butter, sugar, and LOTS of love.  This is a labor of love... you must love them to labor for a dessert THIS much... :)  Before I start the recipe tho- you CAN freeze these... so it can be very money saving... or you can make them and take them to a fund raiser, a suffering family, or its a really awesome peace offering.  TRUST me, everyone will LOVE them.  Hey, if you make it... FLAUNT it baby!  And dont be afraid of mess ups... they still taste great.  I messed these up... but they still tasted great.

Your ingredients:
DOUGH
1/4 c luke warm water
1/2 c melted margarine, cooled back to luke warm
1/2 c sugar
3 tsp active dry yeast (or one envelope)
1 cup milk
1 extra large egg, beaten well  (I used egg beaters - just over the line for 1/4 cup) *room temp
2 tsp vanilla (use the GOOD STUFF)
1/2 tsp sea salt
1 1/2 c wheat flour  (add more yeast if you use all wheat)
3 c white flour 

FILLING
1 1/4 c light brown sugar, packed firmly
5 TBSP Cinnamon (invest in a good cinnamon - but cheap stuff works too... DONT SKIMP..)
1/2 c (1stick) melted margarine

ICING
4 oz (1/2 a box) Cream cheese (I like reduced fat) *room temp
1/2 c (1 stick) margarine - softened but NOT melted - take it out when you start and let it sit
1 3/4 c  white powdered sugar
1 1/2 tsp vanilla
1/8 lemon juice from concentrate (or fresh squeezed if you want to be neurotic)


Ok... so start the dough... you can use a bread machine... just add in the order listed... and stop after the yeast and give it a mix with a spoon... wait a minute, then continue.  Mix on a 2 lb setting.  Be sure your kitchen is warm and free of drafts.

I used a pro-kitchenaid.  I added up to the yeast in the ingredient list above, then mixed with a # 2 setting, then let it rest for 30 seconds.  I added the remaining ingredients and mixed at a #5 speed until a ball formed.  This is a sweet, sticky dough.

I then covered the bowl with plastic wrap and then with a warmed towel.  Let this rest/rise for about 30-45 min.  YOU DO NOT WANT IT TO DOUBLE IN SIZE... You just want a little rise.

While waiting for it to rise, work on the FILLING.
Add all the ingredients to a bowl and mix well.  It will look like this:
After you have it mixed, its VERY important to put it in the refridgerator to become firm again.  I forgot this step and oh what a mess.  Made the next steps impossible.


Next roll out dough.  Put it on a floured surface.  This is also an elastic dough - it will pull back as you roll, do not add TOO much flour... just a little.  Roll it into a rectangle shape. (I have very little counter space so mine is like a square). You want it less 1/4" thick.  This will be LARGE.  You may even wish to make this slightly thinner than I have here...but you do not want "holes" the see through type.


Next, remove the filling and spread it on the dough.  Once evenly spread... spray your rolling pin with non-stick spray and actually "roll" the cinnamon onto the dough.

This is how it should look once it's been refriderated.

Are you getting hungry yet???

***LEAVE ONE INCH CLEAN TO "SEAL" THE BUNS***

Roll tight... I use a roll and tuck method... you want it tightly rolled.  Again, my initial roll in the photo below wasnt as tight as it should be because I forgot to refridge the first batch of filling.  The tighter the roll you make, the easier to cut and the softer your buns are.  Try to get at least 5circles.


 I prefer to place them in a glass dish touching... But my mom always put them in a cupcake pan which works as well.  For the cupcake pan, I did spray them with a baking non-stick spray.


Let the buns rise for about another 30 minutes.  Then place in an oven and bake at 325 for 25 minutes, or until they are LIGHTLY golden brown.


FROSTING TIME!!!!   And yes, Go ahead and take a spoonful of icing and add it to a lick of the cinnamon bowl... you wont regret it. :)

While they are baking, start the frosting.  Again, I used my Kitchenaid, but you can use a hand-held mixer as well.  Don't undermix... the mixing is really needed - I've tried to do this quickly and it doesnt taste the same.

First add cream cheese and margarine.  Beat on low for 5 minutes (yes I said 5 minutes!!) I used setting 2, with the paddle attachment.  Then beat on HIGH for 5 minutes (setting #6).

If you are using a Kitchenaid, switch to the wisk attachment. Then add in the powdered sugar and beat on slow until blended, about a minute.  Then add vanilla and lemon (do NOT leave the lemon out) and blend for one minute on low.  Then beat an additional 5 minutes on HIGH.

No complaining, I told you this was a labor of love, didnt I? 
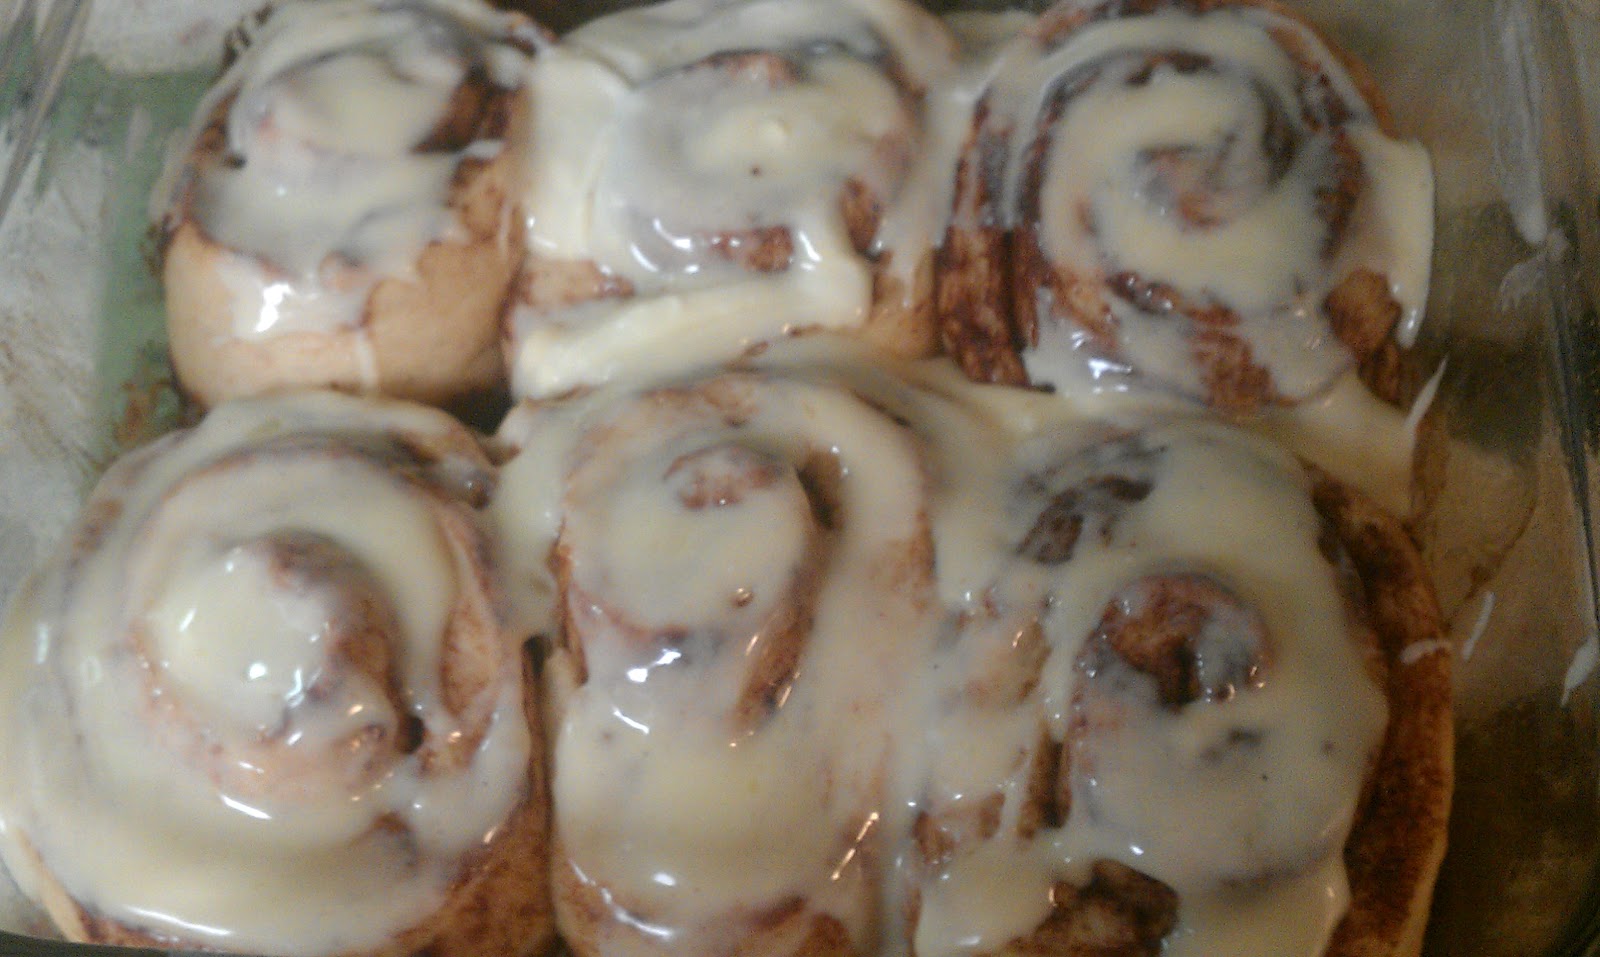
Your timer should be going off... so remove the pan from the oven, and IMMEDIATELY coat with a generous helping of icing.  It will melt off a bit and ooze all over them. YUM.  Don't bake more than one pan at a time... you want them to evenly cook.


Now that you know my secret, I will have to kill you!  Ok ok, so I wont... but if you reblog, or make them, tell them your Dear friend, Char... gave you her recipe (developed from several attemps) for SINNabons!  Enjoy.


Thursday, March 15, 2012

Avocado Pesto Chicken and more


So in January, I made the decision to live healthier. And no, it wasnt a resolution.  I knew that I had left myself go (so to speak), never giving myself the time it took to be healthy because I thought Iwas doing the best thing for my family by giving them 100% of me.

What I learned one day, when I woke tired and achy, was that I was actually cheating my family of precious time with me.  My sister,Kass, whom I love dearly, passed away Feb 21, 2011 from complications of an infection, worsened by out-of-control diabetes.  She was only 44 years old. I promised her I would change and live better.  I'm finally keeping that promise to her.

Ok, so back to deciding to get healthy.  This meant to me, changing the way I ate and adding exercise. Its now March 15 and I have been going strong.  I'll discuss exercise later... for now... food.

I am someone who loves food. I love to taste yummy food and I love to create it. I have never had technique or time to develope technique.  I am not a "cook". But I do like to invent.  Total discloser here:  Inventions are not always edible.

But two weeks ago, I modified a stand by (Pesto chicken) when I realized that I was out of pesto!  Oh the horror... I had company coming to dinner in 2 hrs and my jar of never-fail-pesto was EMPTY.  While panic began to curl my toes, weaken my knees and flip my tummy as it moved upward through my body, my lips allowed an "OH CRAP" to escape my lips.

OK so time to improvise. I couldnt just serve plain, baked chicken. (Eating healthy does not mean that I have to eat bland).  So a quick look around my terribly small kitchen, I noticed 2 avocados on the counter. One very nicely ripe (good and mushy) and one, eh... not so much.   I decided avocado was a gift from the Gods, so it had to make the chicken better!

I mushed the avocado. Ta da! Eh, no.  So I rummaged through my cabinets, feeling very much like Rachel Ray who just seems to always have the PERFECT ingredients at the front of all her cabinets and counters. I grabbed EVOO (see, Im getting savy with the terms... for those of you less experienced inventors - thats Extra Virgin Olive Oil).  Then, I got the idea to make a pesto-like sauce.  I added EVOO. Then, I grabbed my basil from my garden that had been dried and stored.  I crumbled that in the EVOO.  I grabbed some parsley to go too.  OHHH then I remembered the minced garlic. EVERYTHING is better with Garlic!  In went a few spoonfuls.  In putting the garlic back, I  noticed a jar of capers.  For those of you have never experienced capers, I feel for you.  If you like savory - this has to be an item you stock in your kitchen.  They are olive green in color and the size of a pea.  They are very salty. In went a few spoonfuls of capers.

I believe capers were made to go with Feta cheese. MMMM Feta!  (As a friend told me, Feta makes it Betta).   So in went some Fetta.  I cracked some pepper in and mushed away. 

As any good cook would do, I first sniffed it (yum-o), then tried a bite. OH WOW!  This could seriously be a dip if added to some sour cream.  So I layered it on my SAMS Club chicken breast (When I use fresh chicken, almost all of chicken in my house gets a few drips of "Liquid Smoke", a few shakes of sea salt and boiled for a few min.).  Ok, ready to bake right? Wait... heated avocado can turn to brown....(failed invention #2343 has taught me that browned avocado looks like baby poop and NO one finds that appetizing at dinner).  So I grabbed some Hormel Bacon, pre-cooked strips that I keep on hand from Sams.  Emily, my 7 yr old, loves bacon.  The Hormel is already cooked so its a time saver, plus its extra thin so if you are gonna eat bacon -this is the way to go - less fat, calories, etc.

My motto should be Bacon makes it Better!

I dropped a few quick pieces on top and baked it at the standard 350 for 40 min.

OOOOMYGOSHHHHHHHHHHHHHH

It was mouth watering.

You know you have invented something great, when your guest do not really talk until their chicken is gone...and they ask if you have more.   Yep... conversation was very light and I was worried... but then I realized it was because they were inhaling the food. Even my 5 yr old kept asking for "more green stuff". WHAT?!  Little girls should not be asking for GREEN STUFF. Somehow I had, if even for a moment, tipped the scales of justice in the motherhood world.

Oh yes, it really was that good.

Invention # 3253  SUCCESS!

Thank you for viewing my new blog.  I hope to occasionally post things here so that I can share with my friends the exerpiments in life that I was brave enough to try.

Oh, by the way, I am down over 10" and 19lbs.  Due to the amount of exercise Im doing, I am being told that fat weighs less than muscle. All I know, is that my pants walk off me now :) Yippy.  I use Facebook to stay accountable to my workouts, etc... and have told EVERYONE that I am trying to get healthy (and now Im praying the support me if I fail...yikes - in hind sight, what was I THINKING telling everyone). Anyways, I will keep you posted here too.  Healthy or bust, right? Well, technically, I guess that's true. :)